Ok, here we go with our first tutorial,

First, you run your adobe Photoshop .
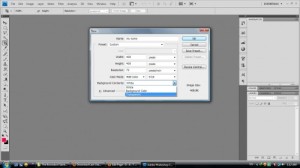
Then, create a new file and name it as you like. Make the size to be 400x400 pixels should be ok, and dont forget to turn the background setting to transparent. You'll make work much easier. I'm just gonna put "My name" as the name of my file.
Fill the first layer with the colour you like. I'm just gonna have this lovely purple. To do that, go to edit > fill. or shift+f5. its that simple.
there you go.
Next, go to blending option of this first layer. Go to the bottom side of the screen, and you'll find a tiny "fx" icon under the layers space above. And click it, and go to blending option.
Now click on the white-black gradient bar, and you'll see some options there. And among those colourful options of gradients you have there, click the second one, which as you can see showing the black to transparent gradient. Choose on that one and set the settings as below.
Simply click OK.
After that, make a new layer by clicking that tiny button at the bottom side.
Then, you select the gradient tool, and ensure that you set the foreground layer as white and the background layer black. if you're not, click "D" and "X" button to change them.
Then you click on the gradient bar on top side of the screen, and choose white to transparent. Make sure you've changed the gradient setting to radial , not linear. Check on the right side of the gradient bar. It must be the second one to be selected, not the first. Picture below shows the first, then change to the adjacent one.
Then drag the gradient across the canvas. Simple rules in photoshop, "Don't forget to play around with things" . You'll find out what suits best with yourself.
Then you set the blending type to soft light, and reduce the opacity to 50%.
Allright, now grab the type tool, at the tool palette at the leftest side of your screen, and drag it to create a space for you to write something. Now write anything that you want. I'll have this core word. That's fine with me.
Make sure you use plain white color. And use whatever fonts that suit you, but I'll stick with Arial, with Black set up. I want it to be highlighting, and space consuming, thus Black is the best. Not bold, or italic, or normal.
And make it at the center. This is essential to make an executive look, because balance, and simplicity is the key. Now this sounds like a professional.
Now change the blending options, or the layer style of your text layer and check the inner shadow. Set the settings like mine. But, it's optional, you can play around with your settings.
Now, reduce the text's layer's Fill to about 63%.
After that, don't forget to save your file into any file you want. But if you want to upload it somehere like facebook, then save it as jpeg file. You can also save your file as .psd for future alteration or something.
And now, voila !
Why don't you share what your work's like in your facebook wall ? Come on, show me what you got !
Good Luck !


0 comments:
Post a Comment